Introduction
When the Touch Sensor Module sends touch notification, it contains event data that describes the state of the current tracked touch (DOWN, MOVE, UP). When connecting the Touch Sensor Module over USB HID, It is recognized as a Touch Screen Digitizer by the Operating System, where a "touch" is recognized on the UP event. In practice, this means that the end user would have to both "press" and "release" their finger (or touch object) before a touch can be preformed. Similar to a tapping motion.
For in-air contactless touch solutions, the application gets a stronger tactile response when the application to trigger on the DOWN event instead of the UP event. This way, a touch will be recognized as soon as a the object is entering the Touch Active Area. In this article, we will show how this can be achieved by binding buttons to the DOWN event of a tracked touch, using a WPF example application. For I2C communications, a demonstration of this can be found in I2C Mouse pad and Keyboard.
USB Touch Screen Digitizer and Mouse
For the application to handle input from the Touch Sensor Module, it needs to both be able to read input from a touchscreen digitizer, as well as a mouse. The sensor module first sends touch input to the host system, which would then get translated to mouse input. Therefore, it is important to make sure that the application can handle both input devices, as well as separating the input devices from one another. Please refer to section WPF Touch Device Handling Application Example for an MVVM application example using WPF.
How to bind the touch event to trigger a button command might differ depending on your framework. It is usually with the same principle as this WPF application shows, but using different formatting.
A "touch" has 4 significant events called, TouchEnter, TouchDown, TouchLeave, and TouchUp that is used to describe a TOUCH event. The wanted touch events (i.e. TouchDown) could then be handled in the application to trigger a button, for example.
| Touch Event | Action |
|---|---|
| Touch Enter | Fired when an object enters the area. Can be either from the side, or a new object registering. |
| Touch Down | Fired when a new object enters the area. Note: Only fired on new events. |
| Touch Leave | Fired when an object leaves the area. Both when it is no longer tracked at all, and when it leaves the boundaries of the button. |
| Touch Up | Fired when a object leaves the area and is no longer tracked at all |
To get a better understanding of the different touch events, please consider the following example.
Example
Imagine 4 buttons that are positioned in a 2x2 pattern called UpperLeft, UpperRight, LowerLeft, LowerRight. Each button can be configured to be fired on one on multiple touch events.
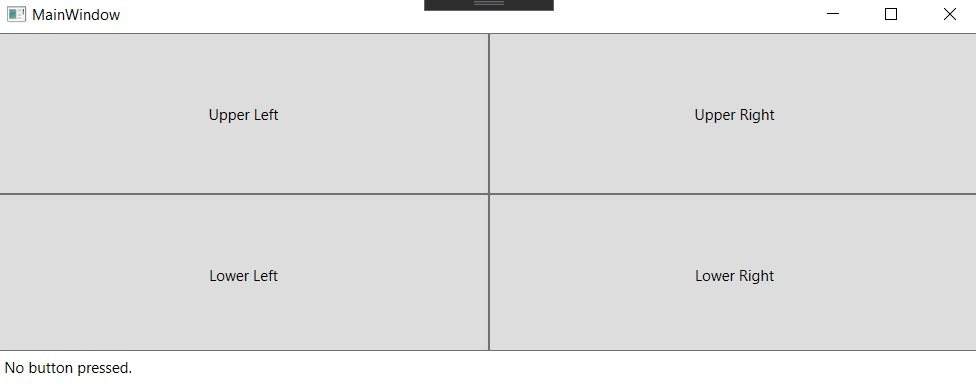
Step-by-Step walkthrough of the touch events in the application
- Start: No touches exist anywhere.
- An object (finger) is detected within UpperLeft. (i.e. you put your finger inside the UpperLeft button).
- The TouchDown event is fired inside UpperLeft (i.e. the handler is called, if it is registered to handle the TouchDown case).
- The TouchEnter event is fired inside UpperLeft.
- The object is moved from UpperLeft to UpperRight.
- The TouchLeave event is fired inside UpperLeft. Note that TouchUp is NOT fired as we are still tracking the object!).
- The TouchEnter event is fired inside UpperRight. Note that TouchDown is NOT fired as this is NOT a new object!).
- The object is moved from UpperRight to LowerRight.
- The TouchLeave event is fired inside UpperRight.
- The TouchEnter event is fired inside LowerRight.
- The object is removed from the LowerRight area. I.e. you removed your finger.
- The TouchLeave event is fired in the LowerRight area.
- The TouchUp event is fired in the LowerRight area.
- No objects are tracked anymore.
WPF Application Example for Touch Handling Demonstration
System Requirements
- Windows 8, or higher
- Visual Studio 2019
- .Net Core
Download the Example WPF Application, here.
Introduction
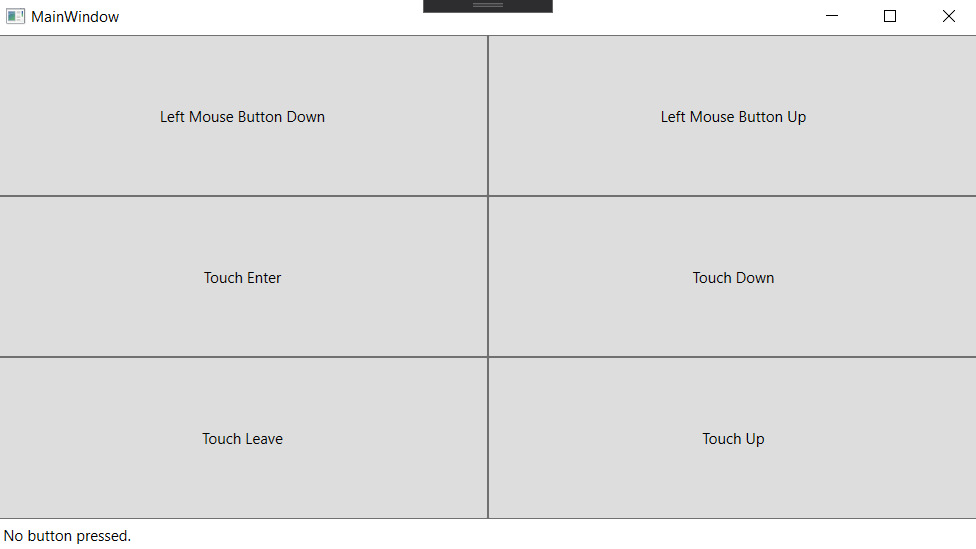
The WPF Touch Device Handling Application both reads and separates TOUCH- from MOUSE events. The application contains of 6 buttons that triggers from different touch- or mouse events. A text is printed in the lower left corner to indicate when a button has been fired, and by what event. The application can be used to test out the effects of the different touch events. The application code is available for reference, which is created in the framework WPF.
To use a Command to handle touches, one must add the NuGet package "Microsoft.Xaml.Behaviors.Wpf", which has been done in this project already.
Event Button Description
In the application, the 6 buttons will each represent an area that different touch and mouse events reacts to. The buttons will trigger to the following actions.
| Button Name | Action |
|---|---|
| Left Mouse Button Down | Triggers from MOUSE event, from pressing down left mouse button. |
| Left Mouse Button Up | Triggers from MOUSE event, from releasing left mouse button. |
| Touch Enter | Triggers from TOUCH event, from entering the event area. Can be either from the side, or a new object registering. |
| Touch Down | Triggers from TOUCH event, when a new touch object enters the event area. Note: Only fired on new events. If a new object enters straight into this area (button in this case), both TouchEnter and TouchDown are triggered. |
| Touch Leave | Triggers from TOUCH event, when a touch object leaves the event area. Both when it is no longer tracked at all, and when it leaves the boundaries of the button. |
| Touch Up | Triggers from TOUCH event, when a touch object leaves the area and is no longer tracked at all. |
How to run the Application
Download the example application.
Open the solution in Visual Studio 2019.
After opening the solution the first time, build the solution once, or it will show an error: "The name "MainViewModel" does not exist in the namespace "clr-namespace:WpfTouchDemo.ViewModels;assembly=WpfTouchDemo.ViewModels".
After building the first time it is able to resolve the name.
- Connect the Touch sensor Module to the computer.
- Run the program (F6).
- When you run the program, the application will start, and 6 buttons will appear.
- Maximize the application window
- When you run the program, the application will start, and 6 buttons will appear.
- Test pressing the buttons using both a mouse device, and the Touch Sensor Module.
- read the latest triggered event response in the lower left corner, and
Binding Description
The input events are bound in the following two files, and those are.
- MainWindow.xaml - Make sure to bind the button commands correctly here.
- MainViewModel.cs - All code that manage button presses is here.
The trigger event TouchEnterButtonCommand for example, is bound using the following method.
<behaviors:InvokeCommandAction Command="{Binding TouchEnterButtonCommand}" /> //Binding TouchEnterButtonCommand
//Bind TouchEnterButtonCommand
this.TouchEnterButtonCommand = new Command ((parameter) => { this.SelectedButtonLabel = "Touch Enter."; }, () => true);
Where TouchEnterButtonCommand is bound to the button "Touch Enter", as such:
    // Touch Enter handling using Command.
        <Button Name="TouchEnterButton" Grid.Column="0" Grid.Row="1" Content="Touch Enter">
            <behaviors:Interaction.Triggers>
                <behaviors:EventTrigger EventName="TouchEnter">
                    <behaviors:InvokeCommandAction Command="{Binding TouchEnterButtonCommand}" /> //Binding TouchEnterButtonCommand
                </behaviors:EventTrigger>
            </behaviors:Interaction.Triggers>
        </Button>
Touch Evaluation Process
Hence, the Touch Sensor Module both sends touch events, as well as mouse events (translated from touch events). The application should however only process one. If it is not taken to consideration, the application would presumably react on both event input.
Mouse events can both be from a mouse device, or promoted from a touch device. If the application reacts open the "fake" mouse events, there might be a small delay, which is why only the first input event should be read. The first event in this case would always be a touch event.
The application distinguish touch events from the translated touch events (mouse events) by checking if the events were originally sent from a touch screen digitizer.
The following code is an example from WPF example application, which concludes if the application should read event- or touch data.
switch ( parameter )
                {
                    case TouchEventArgs eventArgs:
                        // This is a Touch Event.
                        this.SelectedButtonLabel = "Touch Down in Touch Down Area.";
                    break;
                    case MouseEventArgs eventArgs:
                        // this is a Mouse Event. What we don't know is if it is promoted from a Touch Event or from a "real mouse".
                        if ( eventArgs.StylusDevice == null )
                        {
                            // This is from a mouse, i.e. not promoted from a Touch Event. We ignore it if it was promoted, or we get
                            // two clicks.
                            this.SelectedButtonLabel = "Left Mouse Button Down in Touch Down Area.";
                        }
                    break;
                }
Implementation examples
- Design guidelines for touchless interactions with a parallel plane
- Selected Touch Area
- Multi-Sensor Example Application
- Holders for the Touch Sensor Modules
- Neonode Prototyping Board
- Interface Library for Arduino
- USB HID Communication Example
- I2C Mouse pad and Keyboard Example
- Touch Device Handling